How to Connect a Ubotie Keyboard to a Macbook

Understanding Your Ubotie Keyboard
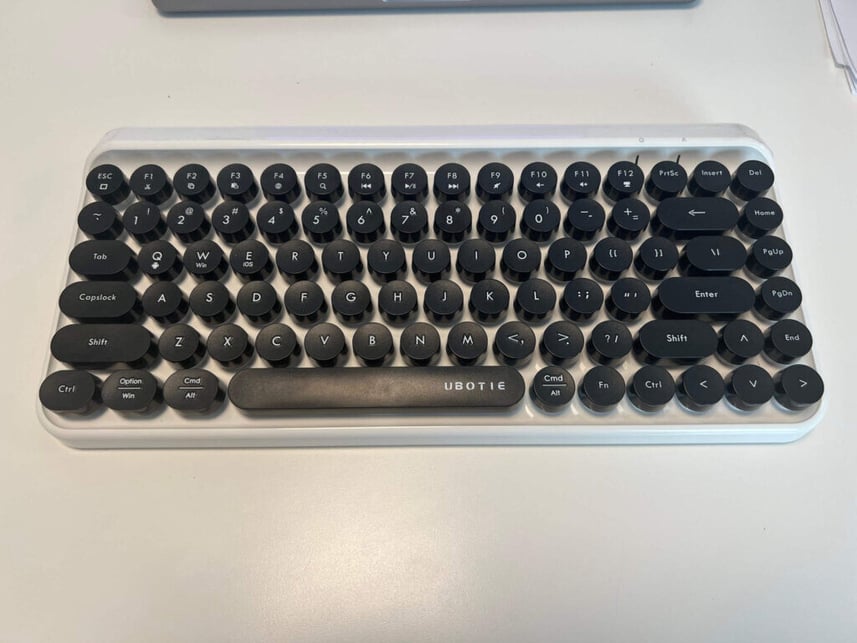
Today we’ll be discussing how to connect a Ubotie keyboard to a Macbook but, before we get into the connection process, it’s essential to understand the basic components and features of your Ubotie keyboard. What many may overlook is that fact that most Ubotie Keyboards do not have a power button. Instead, they power-on when you start typing.
Preparing Your MacBook
Before connecting your Ubotie keyboard, ensure that your MacBook is ready to pair with a new device. Start by checking that your MacBook’s Bluetooth function is enabled. You can do this by clicking on the Bluetooth icon in the top menu bar and ensuring that ‘Turn Bluetooth On’ is selected.
Step-By-Step Guide to Connecting Your Ubotie Keyboard to Your MacBook
Step 1: Turning On the Ubotie Keyboard
Firstly, make sure your Ubotie keyboard is turned on. Though there is no power switch, the keyboard is turned on by inserting two triple A batteries in the back of the keyboard, and typing. The keyboard will sleep and awake on it’s own.
Step 2: Activating the Keyboard’s Bluetooth Mode
Next, you need to activate your keyboard’s Bluetooth mode. This is done (at least on a Ubotie Keyboard) by pressing the ‘Fn’ and ‘C’ keys simultaneously until the bluetooth LED on the keyboard starts flashing. This means the keyboard is now in pairing mode and ready to connect to your MacBook.
 Step 3: Pairing the Ubotie Keyboard to the MacBook
Go to your MacBook and open the Bluetooth preferences. One of the quickest ways is to search “Bluetooth” in the Spotlight Search, then click enter. There are few ways to get there, all of which are listed here.
In the devices list, you should see your Ubotie keyboard listed.
If it’s not immediately visible, wait a few seconds as it may take a moment for your MacBook to detect it. Once you see your Ubotie keyboard listed, click on the ‘Connect’ button beside it.
Once your device is connected, click FN + E to prompt the keyboard that you are on a Mac OS device.
To switch systems (if you’re connecting to another device) you’ll click FN + Q/W/E (Android, Windows, IOS, respectively).
 Step 4: Confirming the Connection to Ubotie Keyboard & Macbook
After clicking ‘Connect’, your MacBook and Ubotie keyboard will start to pair. Successful connection will prompt a display message to appear, indicating that you have successfully paired your laptop. The ‘Bluetooth’ LED on your Ubotie keyboard should also stop flashing, indicating a successful connection.
Troubleshooting Connection Issues
If you encounter any issues while trying to connect your Ubotie keyboard to your MacBook, there are several troubleshooting steps you can take. These include resetting your keyboard, restarting your MacBook, and ensuring your MacBook’s Bluetooth is functioning correctly.
Conclusion
In conclusion, connecting your Ubotie keyboard to a MacBook is a straightforward process when you understand the steps involved. By following this detailed guide, you should have your Ubotie keyboard up and running in no time, enhancing your typing experience with its unique design and functionality.
To Read More Articles Like This, Check These Out:


